Lamin-X Protective Film: Review and Install
 Most automotive enthusiasts like to take care of their car a bit more than the average motorist. We will wash our cars more often, keep the interiors nicely sorted, and take cares to generally protect and preserve that which we are so enthusiastic about. Like anything, this can be taken to the extreme: We have all seen the Cars and Coffee patron buffing their ‘baby’ after someone so much as glances at it. While that may be a tad over-zealous, there is no shame in wanting to protect your vehicle. One of the most oft-overlooked areas of a car is the front bumper and everything around it facing forwards, as they are constantly being pelted by everything other motorists shoot backwards from their tires.
What this means is your car’s bumper, the paint on top of it, and the lights within, are all being hit by bugs, dirt, and rocks. The last example—rocks—should be the concern of every enthusiast, and motorist in general, as they can cause serious, costly damage. Rocks thrown up by other motorists can result in rock chips, cracked windshields, and broken headlights and fog lights. Traditionally, those who are concerned with such damage were faced with a fairly extreme choice in terms of protection; the car bra. The car bra is the automotive accessory equivalent of a man over-buffing his car at a car show: it is simply a bit too much. They don’t look good, they can get saggy, and most importantly; they look awful.
Luckily, there are always alternatives. Protective, clear films are gaining in popularity, both to protect paint and glass in forward facing areas. While expensive to do such a large area as an entire front clip, there are meaningful—smaller—places you can protect for a very affordable price. If your car is equipped with fog lights, it is best to consider them as the bull’s eye to the pebble being shot out of your neighbor’s tire: a tiny target worth quite a bit. Protecting these tiny little bank-busters can be extremely worthwhile, as most films on the market are affordable, easy to install, and most importantly, effective.
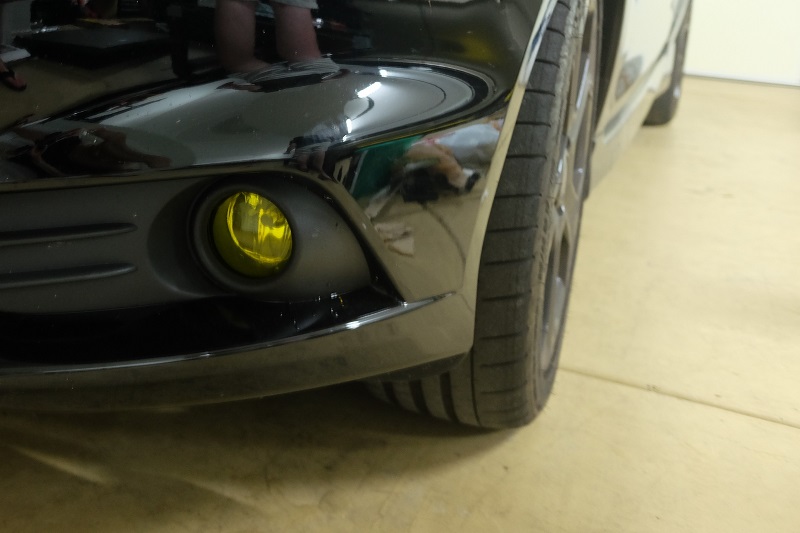
Since I got my 2016 Fiesta ST, I have always had the thought of protecting my fog lights in the back of my mind, but a recent event acted as a catalyst to kick my butt into gear. My mother-in-law has a 2016 Honda Civic Touring, with very similar—potentially the exact—fog lights to my car. In the past two weeks, she has had the unfortunate luck of walking out in the morning on two separate occasions to a broken fog lights: now resulting in both being broken. Learning that, and the cost to replace the fog lights, I decided to research ways to protect my glass. There are a number of protective films on the market—think what you would apply to your phone screen—and I choose to go with the one which combined affordability, looks, and good reviews.

The company that produces my film of choice is Lamin-X Protective Films, and they offer a solution to most forward-facing protection needs. Before I get too deep into the specifics, let’s look fully at why someone would choose to use such a film. Over and above the obvious protection benefits, the only other real benefit is the touch of uniqueness it can give your car. Lamin-X offers a multitude of color options, ranging from purple, to green, to—my choice—rally car yellow. Saying that, it is important to always check and comply with your local laws regarding colored, forward facing lights, as many counties and states ban similar colors to emergency services, namely red and blue.
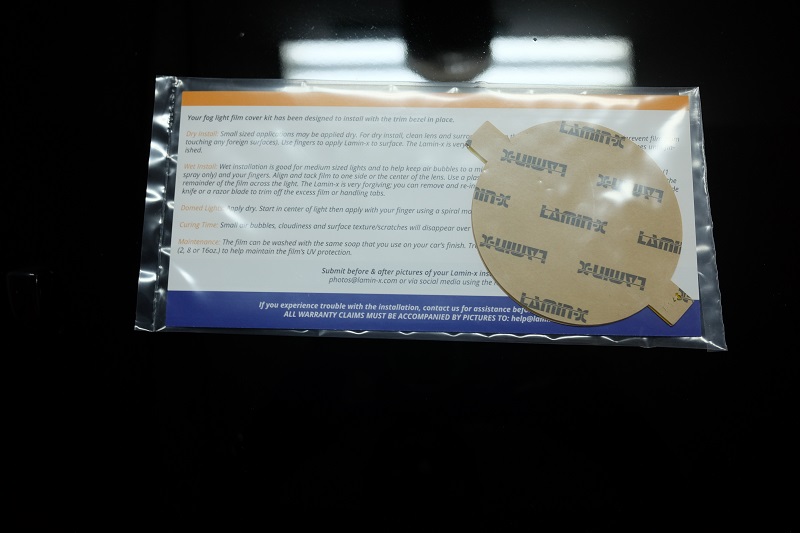
My review of the product will come at the end of the article, with a brief outline of installation—and just how easy it is—beforehand. There are two methods of installation; dry and wet. Dry installation is recommended for smaller surfaces, such as fog lights, but has less lee-way then the wet method. The wet installation method enables easy immediate re-application, ensuring a perfect fit. This is best for larger, or oddly shaped surfaces. Having done both, I can say that neither is difficult, but following the dry installation method—both of which will be detailed below—is certainly easier if your surface is small enough.
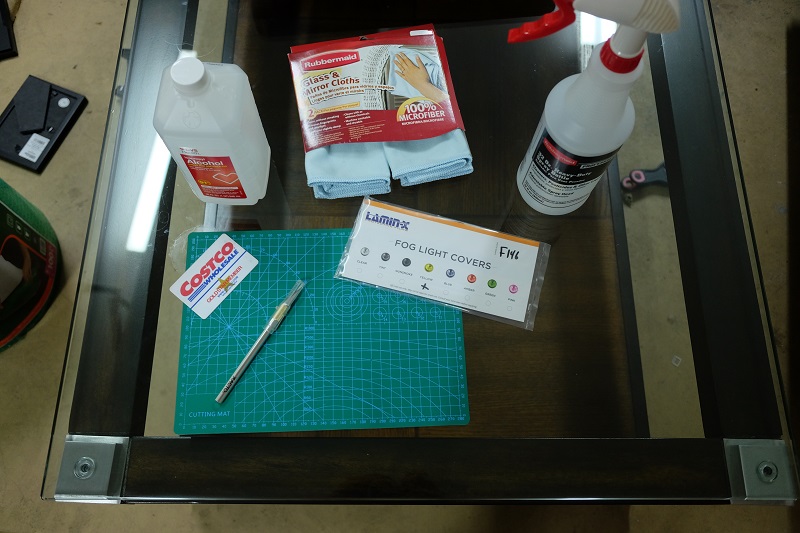
Dry installation is almost as simple as applying a sticker. Anyone who has put on a screen protector for a cell phone will be familiar with the method. Tools needed amount to a thin piece of plastic such as a credit card, and potentially a pen knife, if you wish to remove the application tabs. With either method, it is important to clean the surface with 90% isopropyl alcohol, thoroughly, as anything on the light will soon be under the protector. Once clean, take your plastic and the film in hand and line up the film on the light. Apply the film, using the plastic to firmly—not so firm as to puncture the film—smooth the air bubbles towards the edge of the film, flattening the film. In the process of removing the air bubbles, you may have to ‘tuck’ the edges of the film under the fog light surround, smoothing the edges under the surrounding plastic. If there are a few small bubbles, this is ok, because they will more than likely clear out on their own. Just like that, and the fog light is now protected.
Wet installation begins with the same cleaning regimen as the dry method. On top of the tools before, a spray bottle of water is also needed. Use the spray bottle to thoroughly spray the film, the surface, and your fingers with water, as this negates the adhesive qualities of the film. Despite making everything a little bit slippery, using the water means that you can apply and reapply the film to ensure a perfect fit, so long as you keep everything wet. Generally speaking, the rest of the process is the same as the dry, using the plastic to smooth out air bubbles and ‘tucking’ the film if needed. When the wet method is used the film may appear cloudy, however as it dries, it will clear itself up.
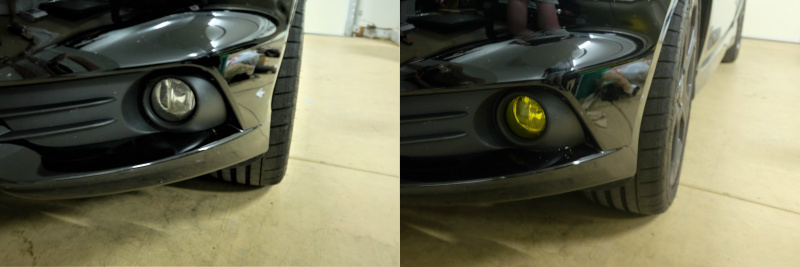
I purchased my film for the entirely reasonable price of $20 shipped, with shipping being reasonably quick enough that I didn’t get antsy enough to pull up the tracking information. The low-price acts as an incentive in two ways: firstly, the low-cost of the film vs. the high cost of a replacement light is an attractive plus in the films favor, while the low price also means that it isn’t intimidating. What I mean by intimidating, is the ease of installation is so simple, that literally anyone can do it, and the cost means that even if you can’t, it is cheap enough to warrant giving it a shot. The film is designed to be removable, meaning it can be taken off whenever needed, for whatever reason. Having gone through the entire process of purchasing the film, installing it, and living with it, I cannot recommend the product enough. Not only does it act as a cost-effective protectant, it offers everyone a chance to add a bit of flair to their vehicle. If flair isn’t your thing, there are also clear films, which offer just as much protection, with none of the looks.
Want to look for Lamin-X film for your car? It is all laser cut, form to fit, and a cinch to install. Go search their website HERE. Like, share, and comment on the article if you have any questions!

Works great looks awesome really brings life to my truck will be ordering in the future for tail lights & headlights 👍
LikeLike